

How to Set Up Azure Health Bot Without Code
In this beginner’s guide, we will provide a step-by-step approach to building an interactive workflow from a standard PDF document using Azure Health Bot without any prior coding or software development experience. With a bit of help from developers in implementing the chatbot into the existing workflows, healthcare organizations can use this guide to easily digitize their existing patient surveys and registration forms.
We will be reviewing two scenarios – a no-code version and a low-code bot that can be built with just a couple of copy-and-paste lines.
Why Azure Health Bot?
Azure Health Bot is a cloud-based service provided by Microsoft that enables healthcare organizations such as providers, insurers, and telemedicine providers to build patient intake workflows, reduce wait times, optimise patients data, answer frequently asked questions, and assist with triage and symptom checking.
Traditionally, developers would create a webform from scratch using HTML and some programming language (such as Java, PHP, Node.js or .NET) to process the results. Another popular option would be using a form builder, such as JotForm, Google Forms or HIPAA compliant form builder.
The specific advantage of Azure Health Bot is the fact that it can be fairly simply leveraged by healthcare professionals. There will be a need for the personnel with development skills once it’s time to handle the integrations; but other than that, the set up of the questionnaires, configurations and the overall workflow does not require programming knowledge.
Azure Health Bot offers an intuitive drag-and-drop interface that is fairly self-explanatory: you can create and customize prompts, statements and flow elements that will transform your questionnaire into an interactive multi-scenario conversational assistant. All that needs to be done at this stage is bringing in a business analyst or a nurse informaticist to configure it. You may also need a hand from a developer to handle the collected data once the chatbot has been deployed.
The Health Bot Service includes a medical database and can integrate with other IT systems and data sources. Additionally, the Health Bot Service addresses regulatory requirements of the healthcare industry by providing healthcare-specific configuration options, a built-in triage and symptom checker, and integration with Language Understanding Intelligent Service and other cognitive services. Users can interact with the chat bot via text or voice, and the Health Bot Service uses NLP and AI technologies to understand users’ intentions and provide accurate information.
How to Program Azure Health Bot: Step-By-Step Guide
Let’s explore how we can leverage Azure Health Bot to digitize a typical Patient Safety Assessment Tool (PSAT). To determine the need for an in-person PSAT visit or a phone interview, the patient needs to answer a series of simple questions that require a “Yes” or “No” response. In a conservative healthcare facility workflow, such surveys would be conducted by phone. However, by introducing a health bot, this step can be fully automated, thus reducing the pressure on the onsite staff and cutting costs.
Creating a survey with Azure Health Bot doesn’t require any coding skills – follow our guidelines to make one in minutes.
Here’s a patient survey script that we will be using for our exemplary bot.
The end result – your healthcare chatbot – will look like this:
Step 1. Create your conversation scenario
Access your profile on Microsoft Azure website and choose “Azure Health Bot” from the menu. Create your new conversation scenario by pressing the button “New”.
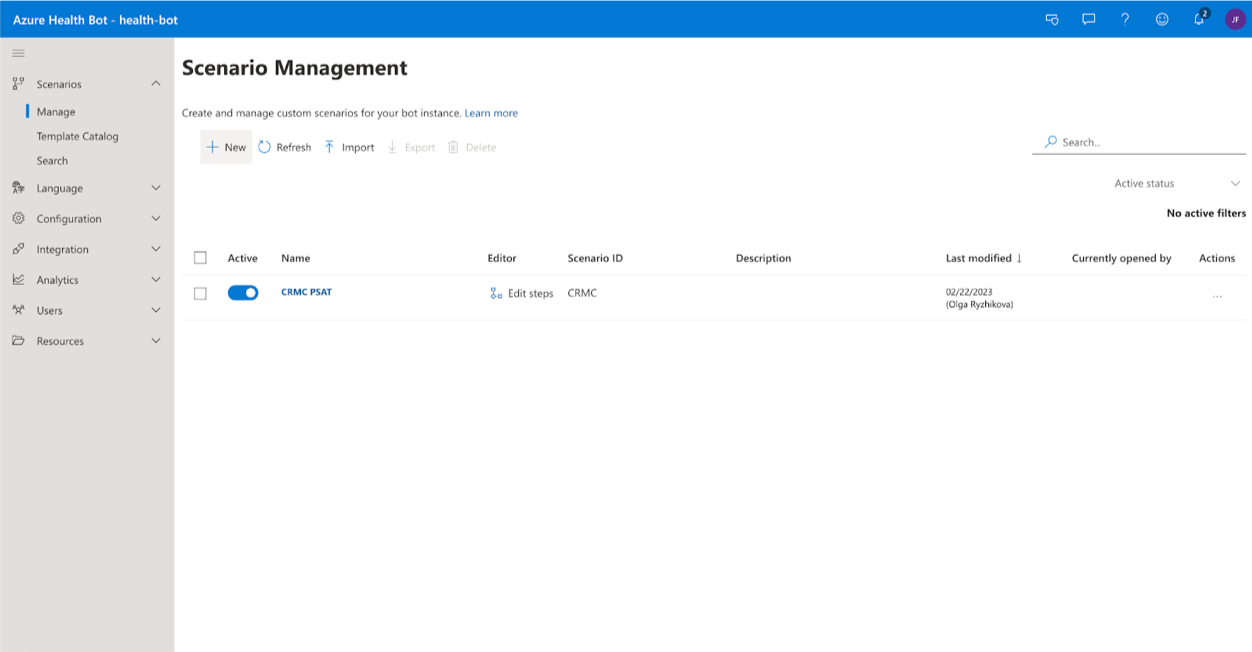
Fill in the corresponding tabs with the name and ID of your scenario to finish creating an item:

Step 2. Start adding your elements
Press “+” to see the dropdown menu and pick the elements that you want to appear on screen.

Let’s start by adding a Statement to greet your patients with an introductory message. Here’s the one we used as an example:
“Welcome to the electronic check-in. Please answer these questions carefully. At the end of this form, our chatbotwill help you to schedule appointment with a medical professional to discuss your upcoming procedure.”
Now, to actually start interacting with our patient, let’s add a Prompt to get their full name.
Step 3. Diversify the conversation flows
The flow of the conversation, as well as its outcome, may depend on the answers the chatbot collects along the way. For example, the questions in the survey may depend on the patient’s age and chronic conditions, and the outcome – an invitation to schedule a call or book an in-person appointment – may vary on the basis of the respondent’s current symptoms.
There are two ways to introduce diverse scenarios into your chatbot: a no-code approach that involves more manual work and a low-code one that helps you save some hassle with a bit of automation.
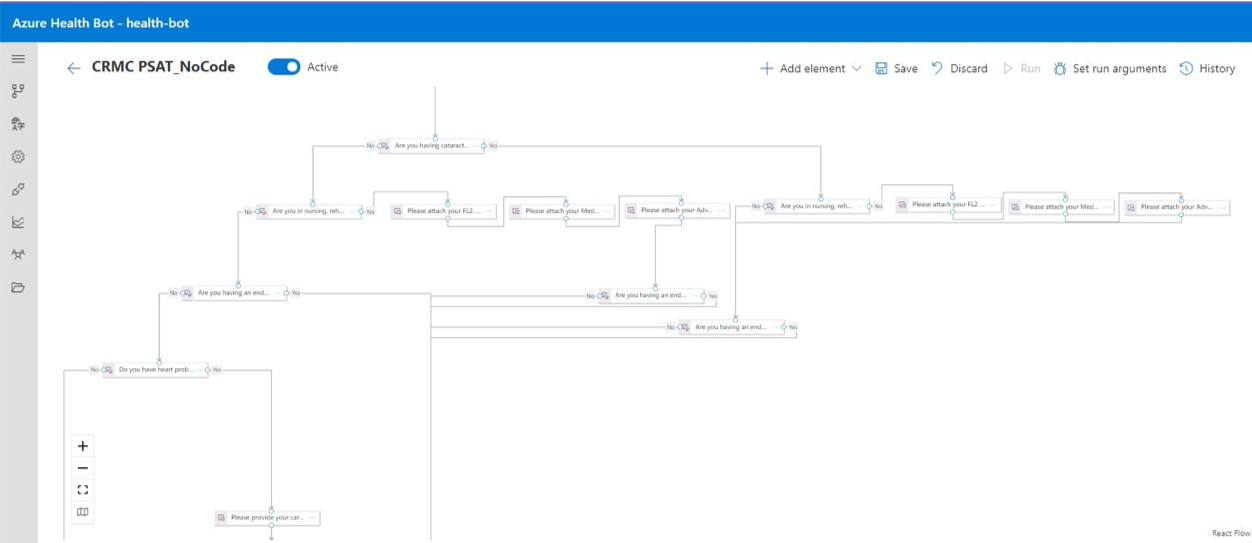
No-Code Scenario
A no-code scenario implies building every branch of the questionnaire flowchart manually. The downside of this approach is that you will have to repeat most of the questions for multiple scenarios. For example, if the patient is asked whether they are having an operation, regardless of the answer, the following few questions would be the same – however, as you have to diversify the conversation flow with this point, you will have to construct two similar dialogue branches.
Here’s what the result may look like:
Low-Code Scenario
To avoid building a complex tree with multiple repetitive scenarios, you can use a couple of lines of code that would make the conversation flow more efficiently and compactly. We will walk you through the approach we applied so you can copy and paste the code from this article into the corresponding fields.
Imagine every time the patient answers “Yes” to a question, they earn a point. After a certain number of questions, the scenario of the consequent part of the conversation will depend on the number of points earned by the patient:
Whenever the patient is required to give a “Yes” or “No” answer, link an Action item to the positive answer;
Click on the Action box to see the field for your code. Now you can insert the following line:
scenario.yesCounter++
This means the patient will earn one more point for this answer;
Link the Action box to the next question;
Repeat for every Yes/No question;
Once you reach the part where the conversation will divert depending on the points earned, you can assign different scenarios by introducing Switch:

For every scenario flow that follows, add another Action box and clear your point count by inserting this line:
scenario.yesCounter = 0

To add another diversification to your conversation flow, repeat this algorithm from step. The end result will look like this:

Step 3. Test your bot
To check your health bot from the very start, press Run to interact with it. You will see our greeting statement in the dialogue section on the right:

As you are programming multiple conversation scenarios, you need to make sure all of them are working flawlessly. However, you don’t need to run the bot all the way from the beginning every time. To test a specific part of the conversation flow, click on the question you’d like to start with and select the option “Run from here.” This way, you will only have to test this particular part of the chatbot, which saves tons of time!
Pro Tip: save your progress after every testing round so you don’t lose all your efforts to one unlucky power cut or technical error.
At the end of your conversations, the chatbot should offer the patient to schedule a phone call or an in-person appointment. At this point, it may be a good idea to invite a couple of your colleagues to help with the testing process. They can offer a fresh perspective and may notice the pitfalls that you didn’t.
Once again, don’t forget to save your progress before closing the editor.
Done! Your chatbot is ready to use.
Step 4. Integrate with your solution
Now that you have a perfectly operational chatbot, you can deploy it in your solutions. Azure Health Bot provides a range of deployment options, including website integration, mobile app integration, and messaging platform integration (e.g. Facebook Messenger or Microsoft Teams).
However, fully integrating the chatbot into your clinical workflow by ensuring structured data collection and storage may be a complicated task to handle without prior experience in development. At this point, you may consider bringing in developers to ensure flawless implementation.
Step 5. Analyze
After the deployment is done, you can easily monitor your chatbot’s performance and make adjustments as needed. To help you process the accumulated data, Azure Health Bot offers an Analytics panel with an array of tools to visualize and analyze the intake provided:

You’re all set!
Congratulations! You now know how to set up an Azure Health Bot instance and create a simple chatbot. Any configuration that you set up can easily be exported from the list of your scenarios into a JSON document that you can easily re-import back in – which is especially useful if you need to replicate it for a new healthcare facility or product.
The versatility of such applications makes them perfect for most patient intake use cases – check out our recent article on accelerating patient intake with health bots. If you’re interested in leveraging health bots for your healthcare organization but need assistance, we can help you with that.
At Kepler Team, we specialize in creating custom chatbot solutions for the healthcare industry and integrating them with the EHRs as well as other healthtech products.
If you have any questions or need help getting started with Azure Health Bot, feel free to contact us or schedule a call to discuss how we can help. We’re also happy to share the scenario setup we created for this article – reach out to us for a free file and an import instruction.
Frequently Asked Questions
Is Azure Health Bot HIPAA compliant?
Yes, Azure Health Bot is built on Microsoft Azure and can be configured to meet HIPAA requirements when used appropriately.
Do I need coding experience to use Azure Health Bot?
No. This guide walks you through the entire process without any programming knowledge.
What integrations does Azure Health Bot support?
It integrates with FHIR, Power Automate, Dynamics 365, Microsoft Teams, and more.
Can I customize the conversation flow?
Yes, using the visual authoring canvas you can build branching flows, add variables, and control logic with ease.
Is it secure for storing PHI?
Yes, when configured correctly on a secure Azure subscription and with proper access controls.
Related Articles

